Wednesday, November 23, 2011

Sweet Table

I'm so excited to share this with you guys. This is my first sweet table and man was it time consuming! I made everything on this table. From the butter tarts, to the sugar cookies and made my first cake which I blogged about here. I made this sweet table for my Dad's 60th birthday surprise party. I based the party on a 1950's diner theme using teal, tiffany blue, light blue and cream as the colour template.

I created sugar cookies in a six and a zero (60), butter tars (for you who don't know what they are it's a Canadian thing!), chocolate covered chips (which made some people go crazy), chocolate milkshake cupcakes, coconut and cherry marshmallows (these were purchased) and a teal ombre cake.

I made the tissue garland out of a lot of tissue paper, it's super easy to make. I also made the cupcake crowns and cupcake toppers with my cricut. All of the signage, invites and photographs were taken my Marc at mkphotographics. He did such a wonderful job!

We held the party at a country club just north of Toronto and about fifty people showed up. It was a total surprise for my Dad which made all the hard work worth it.

Hope you like the pictures and all of the hard work on my first sweet table. I can't wait for the next one I create.


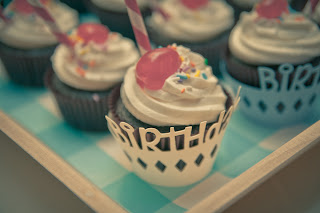
Chocolate milkshake cupcakes


Sweet Table


Marshmallows

Ombre cake

Buttertarts  


Enjoy!


Monday, November 14, 2011

Mini Pies on a Stick

About a month ago I got Jessie Olsen's "Cakespy Presents: Sweet Treats for a Sugar-filled Life" book and it's amazing. Over the years I've made things from her blog but hadn't tried the mini pie recipe. I made these for my Dad's birthday with cherry pie filling (his favourite). One thing you have to make sure is that you push the stick really well into the crust or they will fall off once baked. A nice light dessert, especially if you don't want a whole slice of pie.

Cut dough circles with a biscuit cutter 
three cherries fit perfectly no the dough


Can't help but squish all of the filling out 

Enjoy!


Sunday, November 13, 2011

Teal Ombre Birthday Cake


I recently hosted a big surprise party for my Dad's 60th birthday. One of the many desserts I made was a teal ombre cake. I had seen some many pictures of pink ombre cakes on the net and really wanted to make one my self, as I am obsessed with ombre right now. The theme for the party was 1950's. The main colours we used were teal, tiffany blue, light blue and cream.

It's super easy to make an ombre cake. All you have to do is choose your favourite white or vanilla cake base (recipe or boxed mix) and tint the batter to your liking. The hardest part is making sure that the layers have a different amount of dye. Also the colour lightens when baked so you need to make sure there is a gradual difference, which can be quite hard.

To make a four layer cake you need a double batch of batter and two 8" round cake pans. Make sure to grease the pans and put a layer of parchment paper on the bottom for easy release. Each batch makes two layers. Let them cool then stack them with vanilla buttercream between the layers. I did a crumb coat on the outside and a final dot (not really sure what it is called) technique on the final outer layer. I also made some star decorations with my cricut cake machine and put them on floral wire.

Crumb coat

Dots

Dots, smeared 


It turned out to be a great cake, especially it being the first cake I have made. I'm a cupcake girl!


This is the only picture of inside the cake that was taken. The knife we had just shredded the cake but you still get what it looks like.

Enjoy!